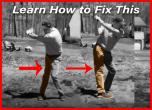
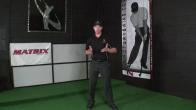
A lot of golfers don't fully understand how the arms work in the golf swing, and that's why so much time is spent discussing the trail arm without giving equal attention to the lead arm. The lead arm in the golf swing has an equally critical role to perform — perhaps even more so, because it directly controls the club face through impact. Without a clear understanding of what that arm is doing from transition through the hitting area, directional control becomes largely a matter of luck rather than skill.
The trail arm's job is primarily to generate speed and support the lead arm through the downswing; whereas, the lead arm controls both trajectory and direction. In this detailed 20-minute video, the discussion covers exactly how the lead arm works in the golf downswing — both to prevent the very common golfer's elbow injury and to maximize shot control by understanding how the lead arm should be rotated and positioned at impact, along with the critical role of the lead wrist. If you want to stop spraying shots and start making consistently solid ball striking your reality, this is one of the most important lessons you can study.
Want to feel this in YOUR swing? Try a free AI-powered golf lesson → — GOATY gives you real-time voice coaching, pose tracking, and instant feedback on every rep.
Related: Fix coming over the top with live AI coaching →
Android users: Download GOATY on Google Play — free AI golf coaching on your Android phone. →

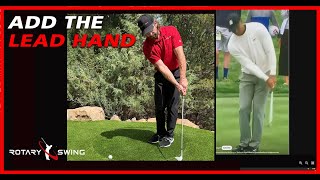
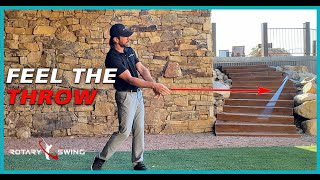
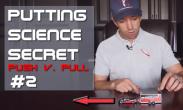
The left arm pulling with the help of the right arm pushing is what allows the hands to get in front of the ball at impact and create shaft lean as you see here.
Stop reading about it — feel it in your swing today
GOATY watches your swing live and coaches you between every rep. Free. No signup.
Start Your FREE Live Lesson →LEAD ARM DOWNSWING DRILL
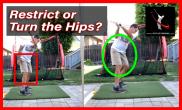
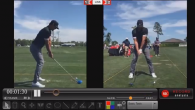
The Lead Arm Downswing Drill (LADD) is covered in two distinct phases — both without a golf club and with a golf club — allowing you to master the impact position alignments that are absolutely vital for directional control and shot trajectory. The critical topic of getting stuck in the downswing is addressed in depth, including how the incorrect movement of the lead shoulder easily creates that dreaded trapped feeling, and how the lead shoulder must work to get into the proper impact position. This is a drill that literally rewires how you think about controlling the golf ball.
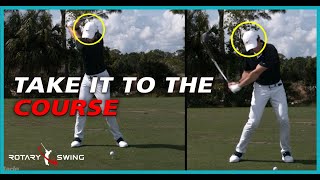
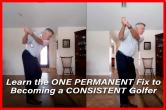
If you have an otherwise functional golf swing but struggle with spraying the ball across the course and playing Army golf — left, right, left, right — this video will set you straight once and for all. The lead arm's role in the golf swing cannot be overstated when it comes to the direction the ball flies. This is the missing piece that most amateur golfers have never been taught. Want to see your own swing analyzed and find out exactly what's costing you yards and accuracy? Try a free AI swing analysis and get an instant assessment of your mechanics.
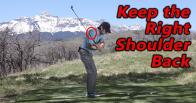
If you struggle with getting stuck in the downswing and hitting a lot of blocks and snap hooks, the movement of the lead shoulder and the lead arm from the top of the backswing — as discussed in the second half of this video — will make a tremendous impact on your ball striking. You will finally be able to control trajectory and direction and stop finding yourself in a pattern of just hoping to make solid contact on any given shot. The difference between an inconsistent golfer and a consistent ball-striker often comes down entirely to what the lead arm is doing from the top of the swing through impact.

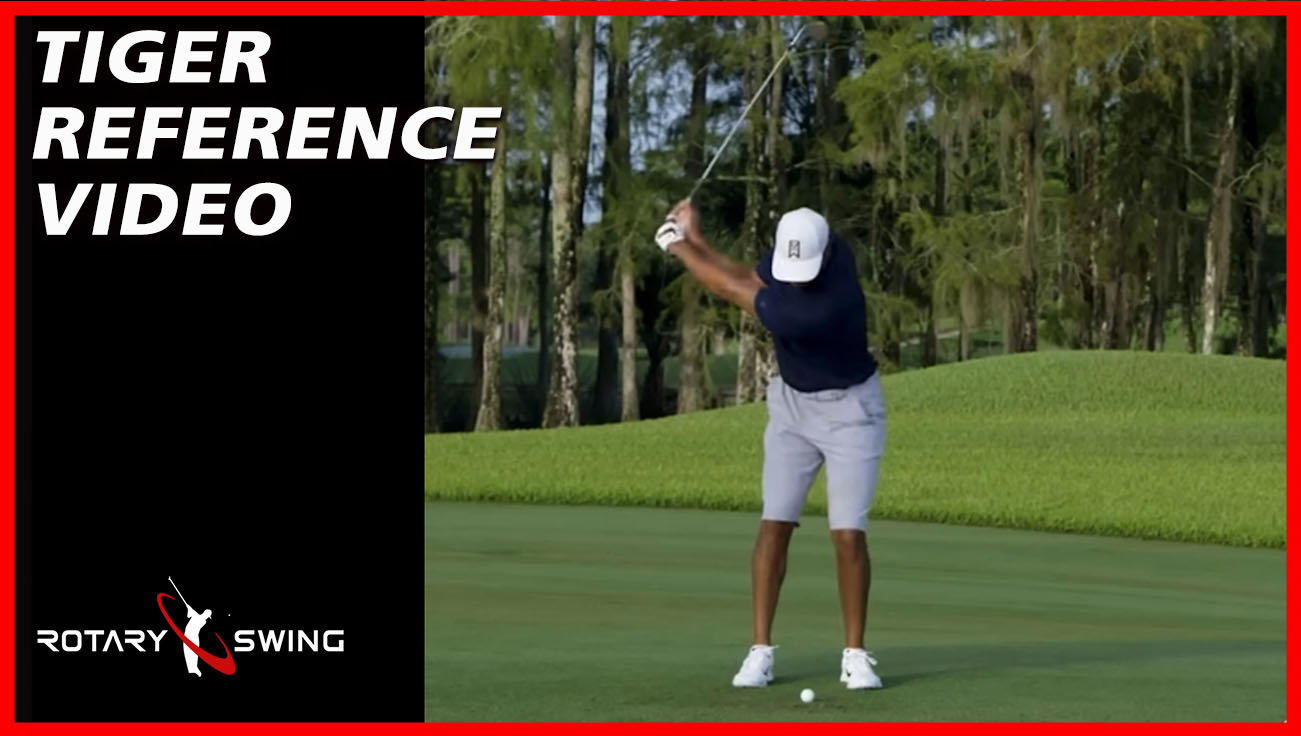
Click image for larger view.
Lastly, if you find yourself reaching the top of the swing and uncontrollably unwinding your torso and hips — casting the club before it can do any useful work — this video will show you exactly how to make a proper downswing sequence and how the lead arm facilitates a controlled, powerful delivery so that you can feel stable and in command at impact, rather than spinning wildly out of control and praying to make solid contact.
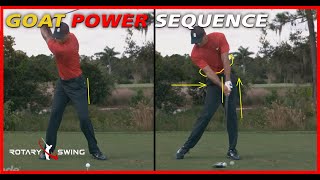
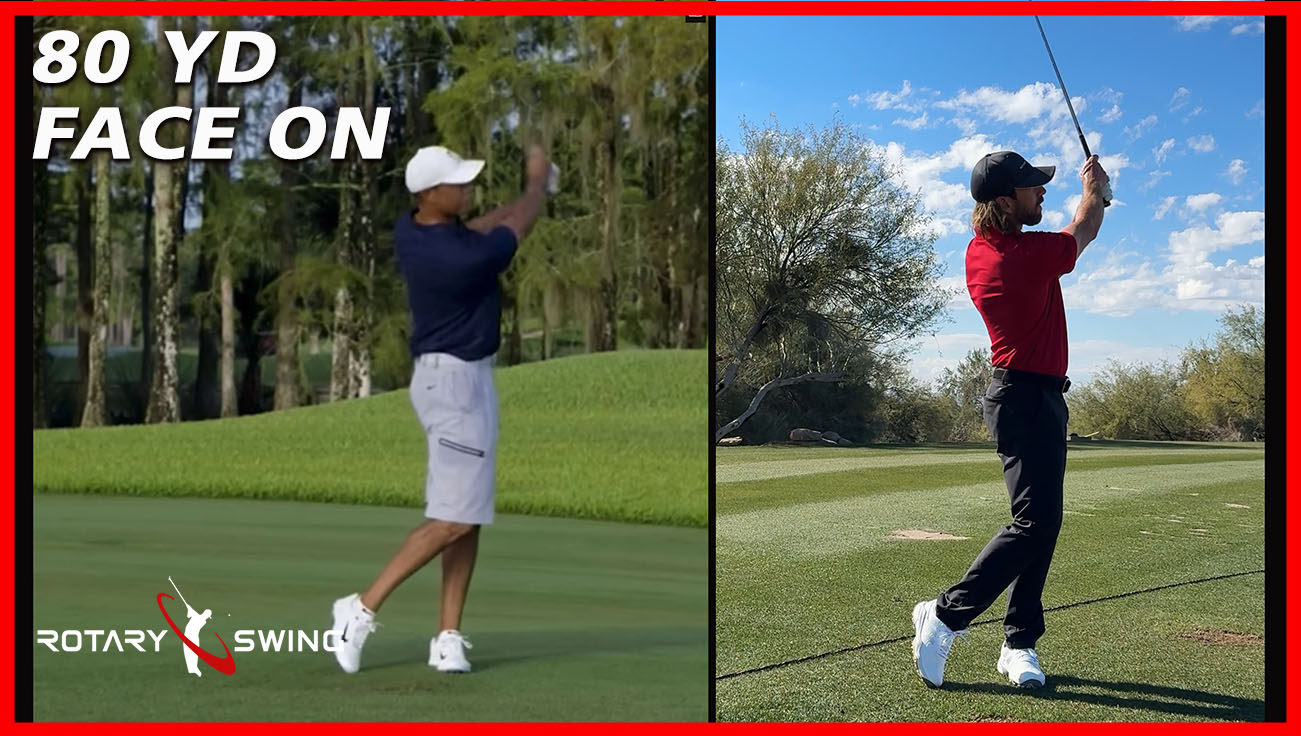
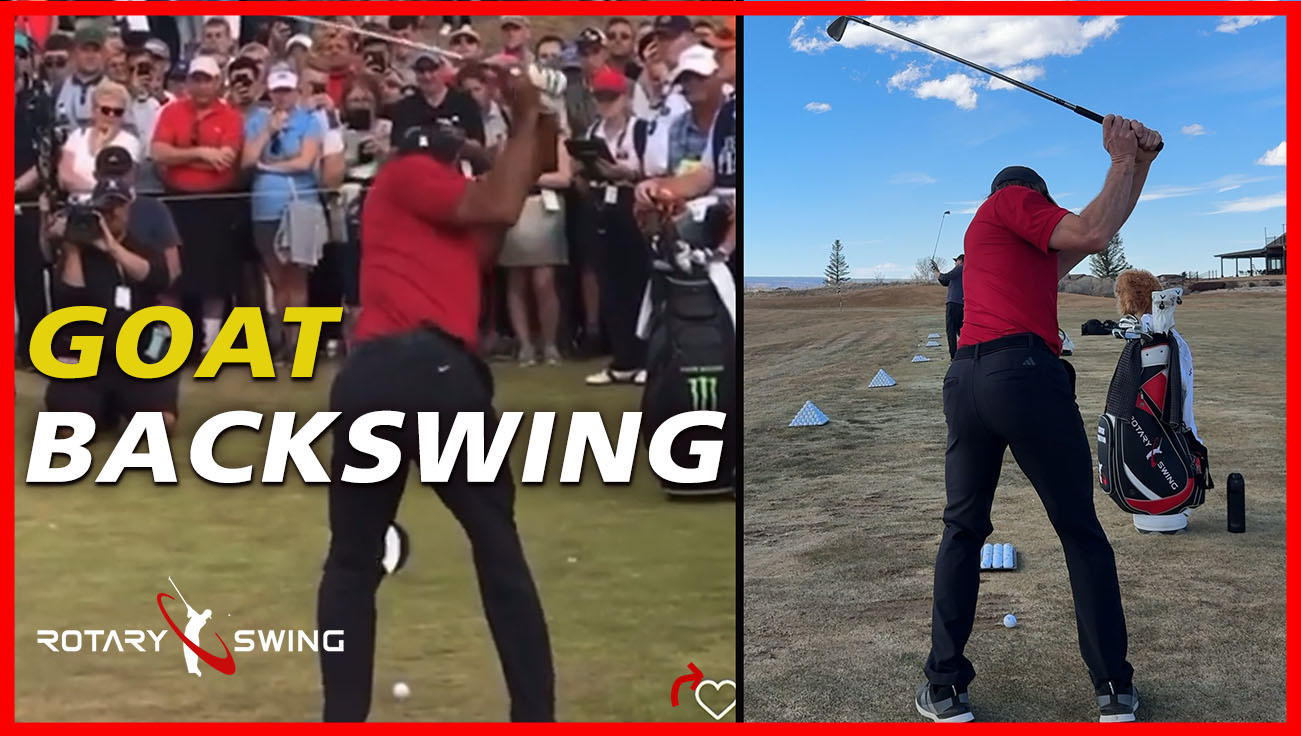
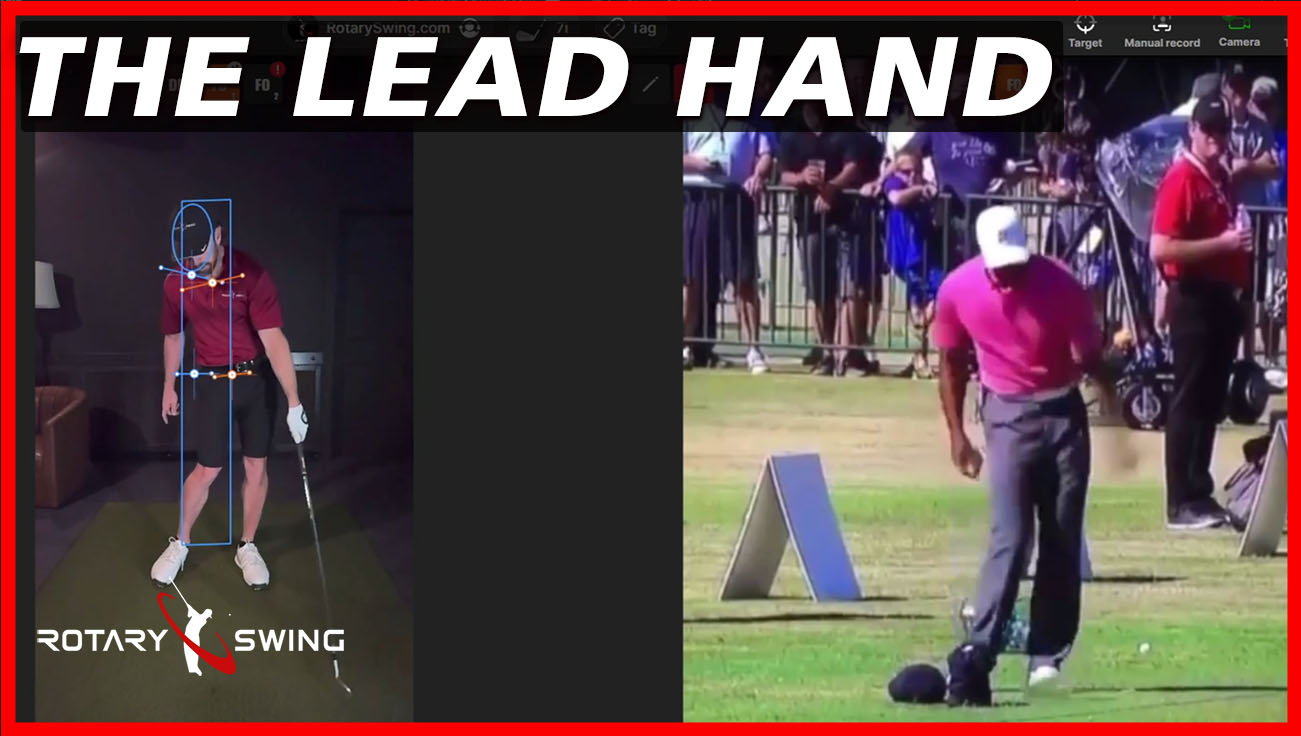
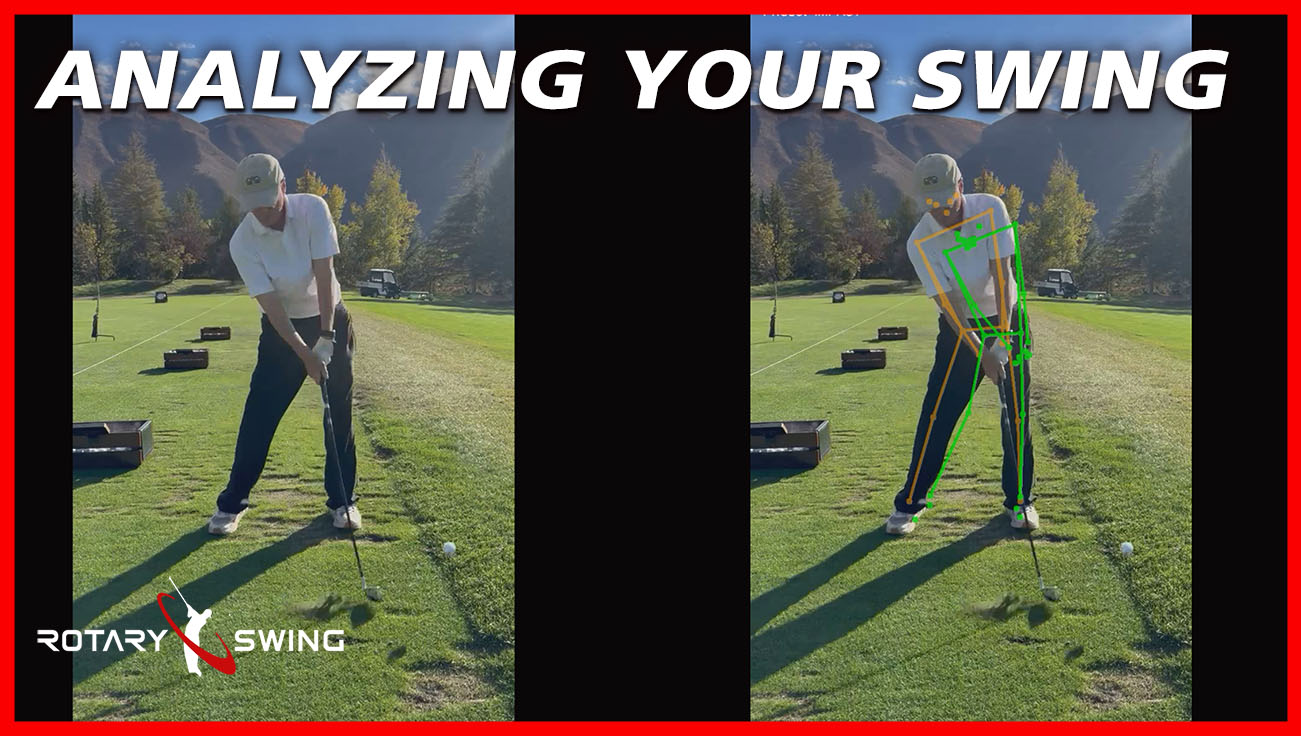
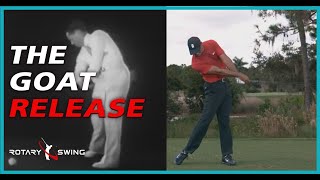
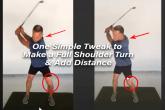
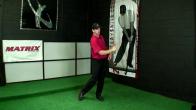
The image of the GOAT Model tells the entire story of how the lead arm properly works in the golf downswing. Notice that at the top of the backswing, the angle formed by the lead arm and the shoulders is approximately 56° when viewed from this angle.
By the time the hands are approximately at pants-pocket height during the downswing, that angle has dramatically increased by nearly 40° through the use of the proper pulling motion of the lead arm, which is actively supported by the trail arm. Notice that the chest is still pointing well away from the target at this point, creating that characteristic closed appearance and giving the arms time to get back in front of the body as the player approaches impact. This separation is what makes everything possible.
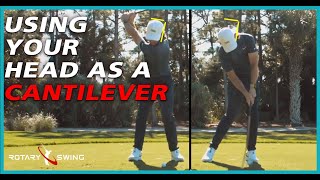
This creates the effect of the lead shoulder appearing much lower than the trail shoulder — whereas golfers who tend to get stuck in the downswing would have the appearance of both shoulders being nearly level at this same point. For those stuck players, when the upper torso starts to unwind, the hands simply can't catch up. The lead shoulder only needs to move about six inches, while the hands need to travel about six feet. The math simply doesn't work when the shoulder fires first.
This ends up creating excessive secondary and leads to a swing path that is too far from the inside, producing the dreaded push, push-hook, or block pattern. As the GOAT Model uses the proper musculature of the lead arm to help move the club back down in front of the body, there is the ability to bring the hands much more down on top of the ball, creating a sharp descending blow that allows the player to flight the ball low without making excessive compensations in the setup or swing. This is elite-level ball control that any dedicated golfer can learn.

Even the highest-spinning players on tour are still able to control their trajectory at notoriously windy courses during challenging weather swings. That kind of trajectory control under pressure separates elite players from everyone else, and it begins with understanding what the lead arm must do.
Without creating separation between the torso and the lead arm — by pulling with the lead arm to move the hands down in front of the body while keeping the shoulders passive — there is no ability to control ball flight consistently. This is why the LADD drill is so important: it teaches your body the exact sensation of proper lead arm function under load, so that when you actually swing a club, the movement becomes instinctive rather than reactive.
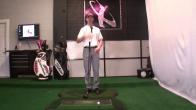
Video Transcription: Left Arm Downswing Drill
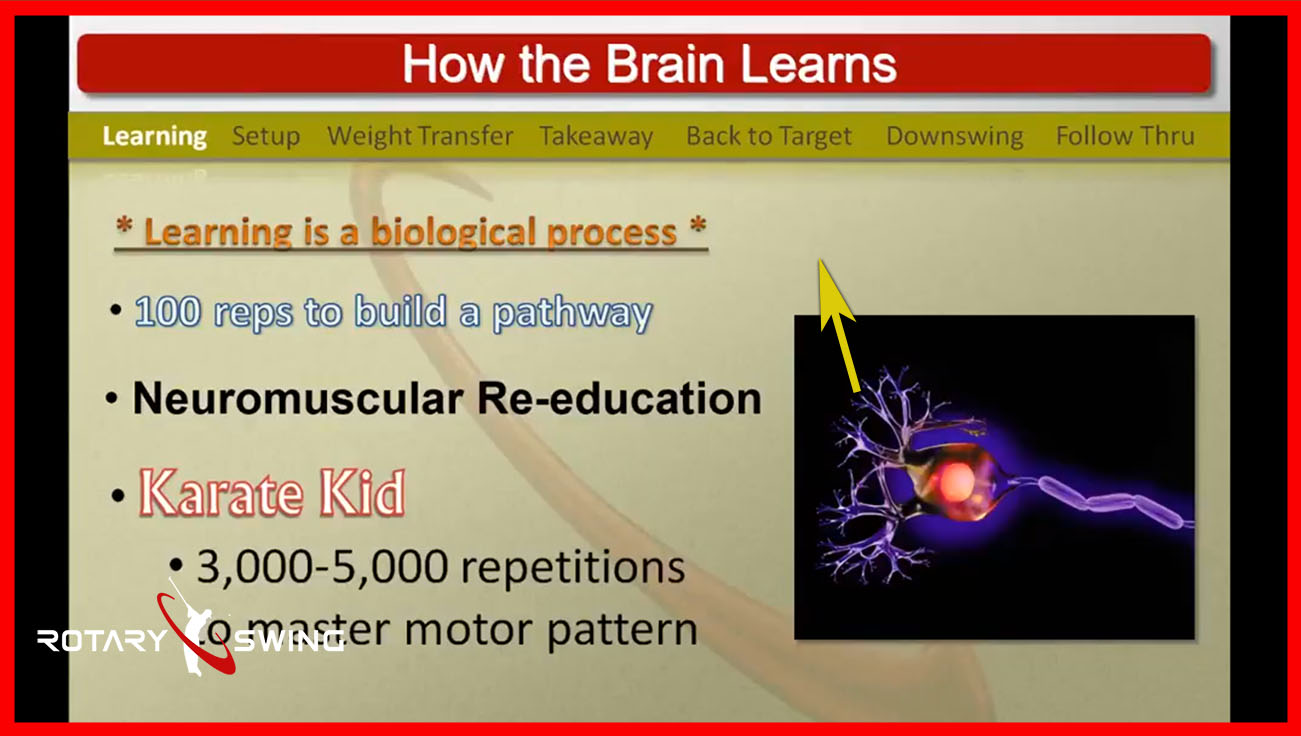
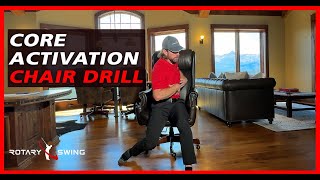
We all know the golf swing takes a lot of work. There's a lot of repetition that's needed in order to master any new movement pattern in the golf swing — that's just the way the brain learns new motor skills.

The left hand and wrist control the club face through impact
What we're going to talk about today can actually make an instant impact in your ball striking. That doesn't mean you're going to go out and do it perfectly every time — that's where the repetition and the practice come in — but what you are going to find is that for once you're going to start to really understand what controls ball flight in the golf swing. Once you understand it at a mechanical level, every practice session becomes more purposeful and productive.
{josociallocker}
When we talk about ball flight, there are a couple of things that we're specifically dealing with. One is trajectory control. The better a golfer you become, the more important trajectory becomes in your ability to score in all conditions, consistently. A player who can only hit one trajectory has a ceiling on their scoring ability; a player who can flight the ball up or down at will is truly dangerous in any condition.
Trajectory management is a huge piece that is important when working with professional-level golfers — especially in places like Florida where the wind is a constant factor. If you're in an area that's very windy, you're going to want to pay very close attention to this video, because the ability to hit low penetrating shots or high soft shots on command starts with understanding the lead arm.
The second critical element is directional control. For those of you who have read the Instructor's Manual for Level 1, you've seen some discussion about how the trail hand and the lead hand work together. Today, that's what we're going to focus on specifically — what the lead hand does in the golf swing and how the bones, joints, and muscles need to be in alignment for both control and power. If you want to see how these mechanics are assessed in real time, check out the GOAT Drill video lesson — it shows exactly how modern AI coaching measures your alignment at impact.
Specifically when we're dealing with the lead hand mechanics, there are a couple of areas to focus on. First, we're going to focus on the back of the lead hand and the lead wrist. Second, we're going to focus on the lead elbow position through impact. These two checkpoints together tell you almost everything you need to know about what the lead arm is doing.
We know at address we're trying to keep everything in a neutral position so there are minimal chances for injury, we're connected to our power source in the core, and everything is set up for efficiency. At impact, those positions change significantly. We don't want impact and address to look the same, because at impact we're trying to generate power, stability, and control simultaneously — some of the joint positions are going to be very different from where they were at address.

External elbow rotation above, internal below
The positions that elite players are in at address versus at impact are very, very different — and that's how they should be. That's just the way the dynamics of the golf swing work. Impact is a dynamic event, not a static position, and the lead arm is at the center of making that dynamic event consistent.
When we talk about the lead arm in the downswing, it has a very, very important and specific role to perform.
Its primary role — the back of the lead hand, the lead wrist, this entire zone of the arm — is predominantly controlling the club face through the hitting area. It performs this function on the backswing as well, since some rotation occurs in that arm going back, but as we get into impact the orientation of that face is going to help you track exactly where the club face is pointing through the shot.
It's a simple measurement. If you have a proper grip and that lead hand is in a good position at impact — nice and flat, pointing directly down the target line — then the club face should be pointing there as well. That's the fundamental connection between lead hand position and club face control that most amateur golfers are never taught.
If the back of the lead hand is pointing out away from you, the club face is open. If it's pointing inward, the club face is, of course, closed. It really is that direct and that simple once you understand the connection.
When dealing with that relationship, we also need to look closely at the lead elbow position. This is an area where inconsistency breeds inconsistency — and it doesn't mean the rest of the swing is bad. You can have a genuinely beautiful golf swing, and people can walk up to you on the range and watch you hit balls and be impressed, while you're internally baffled because you're spraying it all over the place and you have no idea why. A lot of that mystery can be explained by the lead elbow position through impact.
What a lot of golfers do — particularly those who get stuck on the way down — is that the lead arm externally rotates very quickly through the hitting area. If you just rotate your arm rapidly in external rotation, think about what's happening to your hand. It's spinning and turning at a very high rate. Now imagine a golf club in that hand. The club face would be square, then wide open as the arm spins, then rapidly rotating shut — and you're trying to time all of that through the hitting area at impact speeds. That's an extraordinarily difficult challenge.

Elbow and wrist rotation control the club face
Now, if I put a golf club in there and back up just a little bit, as that arm externally rotates it goes from square to wide open to shut as I spin it through. Now I'm trying to time this rapid rotation through the hitting area — the absolute worst scenario for consistent ball-striking.
It's not desirable at all, because at the same point that the arm is rotating in external rotation, the wrist can rotate independently as well. So now I could have the arm completely stationary and still spin the club face all over the place with wrist action alone.

A vertical shaft would make the too steep
I can have all of these great positions going back in the swing, and if I'm trying to time external arm rotation happening at thousands of degrees per second through the hitting area, I'm never going to do that consistently. Not once every hundred shots, not once every thousand shots. The timing window is simply too small for any human being to find consistently.
That's why this video is so incredibly important, because what we're going to do is give you specific drills to get the lead arm in the correct position at impact so you are consistent on every single golf shot. Let's talk about exactly what that looks like and how to train it.
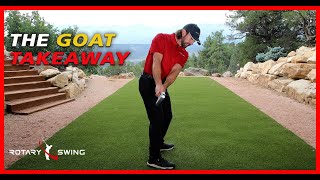
As we go back, at the top of the swing the shoulders are loaded and everything is maintained in a coiled position. The lead shoulder comes out of the box a little bit at the top of the backswing. When that happens, the arm rotates just slightly.
This is actually an important part of the swing. If the arm were to stay in complete neutral position without any rotation, the club shaft would be vertical — creating a really steep swing plane. As we go to the top of the backswing with the arm in neutral, the plane would be extremely steep and there would be no way to get into a good position at impact. All we need to do is allow the lead arm to rotate a small amount going back, and suddenly the shaft falls onto a proper swing plane.

A slight rotation flattens the shaft
That arm rotates from just outside of neutral — slightly internally rotated at address — then as it goes back it rotates approximately 50 to 70 degrees depending on the individual's swing and build. As we get to the top, the arm is in this rotated position rather than neutral. If we were to start the downswing by spinning that arm back the other way in external rotation, the club face would immediately move into a badly open position. That's what we don't want.
What we actually want to do is the opposite. The internal rotation slightly increases on the way down during the transition. This is a minimal change in degrees — this is not something you're going to consciously work on in your swing. It's just the nuts and bolts of what's actually happening anatomically. This is not something that most golfers will ever need to specifically work on, unless they have a specific documented issue with external arm rotation on the downswing.
What happens is, as that arm is internally rotated at the top and you start coming down specifically by spinning the shoulders aggressively, the arms get trapped behind the body and you come . But if that arm rotates just a few additional degrees internally as everything starts back down, notice how the shaft has a flattening appearance on the downswing — that's the shaft dropping down onto the proper plane rather than looping above it. We want that shaft flattening move on the downswing. That's elite ball-striking.

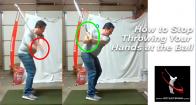
The elbow points down the line at impact
The exaggerated version shows it clearly. The shaft starts to come back down on the proper attack plane rather than coming over the top of the plane. Coming over the plane is the classic amateur mistake that creates pull-slices and weak fades. Everything about proper downswing sequencing is designed to keep the shaft on the proper plane.
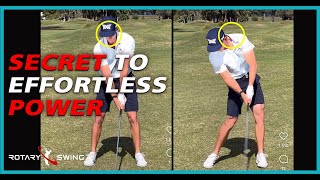
The critical point is that as the lead arm internally rotates a bit more and comes down into the impact zone, the lead elbow points down the target line. That single position — elbow pointing down the line — allows complete control over the amount of rotation happening through impact, because the club face is rotating back to square through the hitting area as it must. As that rotation is happening, the movement is coming from the wrist and the forearm bones, rather than from the arm rotating wholesale in the shoulder socket.
Now, instead of having two independent pivot points rotating simultaneously — the arm spinning in the shoulder socket AND the wrist rotating — one of those variables is eliminated. The elbow gives us a concrete reference point. It's going to be pointing almost directly down the target line. We use 90 degrees of internal rotation as the working reference point.
In other words, zero degrees is the elbow pointing straight out from the body in external rotation. If the arm is turned 90 degrees internally, the elbow is now pointing straight down the target line. That's the checkpoint. That's what you're training toward.

The wrist rotates into impact
As the swing comes into impact against the bag, you can check that the lead elbow is pointing down the target line and the lead wrist is flat. Instead of trying to time all of the flippy, rotational motion coming from two different sources simultaneously, you're only managing the rotation at the wrist. One variable instead of two is a profound improvement in the ability to be consistent.
That simplification — eliminating one moving variable — takes the focus off the arm and puts it entirely on the wrist. One variable instead of two is a massive improvement in the consistency equation.
This is a very important movement pattern to train as you're learning to control impact position. The way we typically approach this is straightforward. From the top of the swing, put the golf club down and just use the lead arm alone.
Get into a position where, as you come into impact, the lead elbow is pointing down the target line, and start rotating the lead wrist gradually into impact. This is not a movement where you're keeping the face wide open and at the last second trying to flip the hands over to save the shot. This rotation is actually happening almost from the top of the downswing — it is a gradual process, not a desperate last-second timing move.
You don't want to be trying to time a rotation that begins late in the downswing. You want to be starting to rotate the face back to square early in the downswing. As the arms come down, the club face is squaring up early. It's already looking back at the ball well before the club reaches the impact zone. Then as everything arrives at the ball, only a minimal final rotation is needed.
If the face is kept wide open through the transition, now you're in the worst possible position — you have the club face wide open and you've got to really flip the hands over violently at the last possible second. That's no good. We want this natural, gradual club face rotation throughout the entire downswing, so that the face arrives square without any desperate last-second manipulation. That's the feeling of a well-trained lead arm.

Only the wrist is rotating
That last-second flip is a terrible pattern for golfers who otherwise have a solid-looking golf swing — every single shot is a prayer rather than a plan. That pattern almost always comes down to how the downswing is initiated, and specifically what the lead arm does from the top. That's exactly what the Lead Arm Downswing Drill addresses head-on.
Without a golf club, the drill is performed by taking the trail arm completely out of the equation for now. From the top of the backswing, work on keeping the lead shoulder shut and pulling the lead arm down so that the elbow is pointing down the target line and the wrist is rotating gradually into impact.
Separate these two movements clearly. You are not rotating the entire arm in the shoulder socket. You are rotating the lead wrist into impact. You're doing this with the lead arm only to build the pattern in isolation before combining it with the full swing. Why wouldn't you want to just get to the top and spin the shoulders aggressively and fling the arm off the chest?
The answer is simple. Spinning the shoulders feels very powerful — your body is putting a lot of muscular effort into it — but two things happen that are completely detrimental to the golf swing.
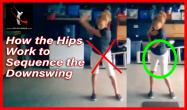
First, if you go to the top and just spin the shoulders, the arms get trapped behind the body. There is no way around this anatomical reality. The lead shoulder, to get from the top of the swing back to impact, has to travel about six inches. The hands have to travel about six feet. How is it possible to match the speed of something that is six feet away from center getting all the way back to impact, trying to catch up with something that only needs to move six inches before the body is stuck? It simply cannot happen. The hands will always lose that race when the shoulders lead the downswing.

Shoulders are shut at the top
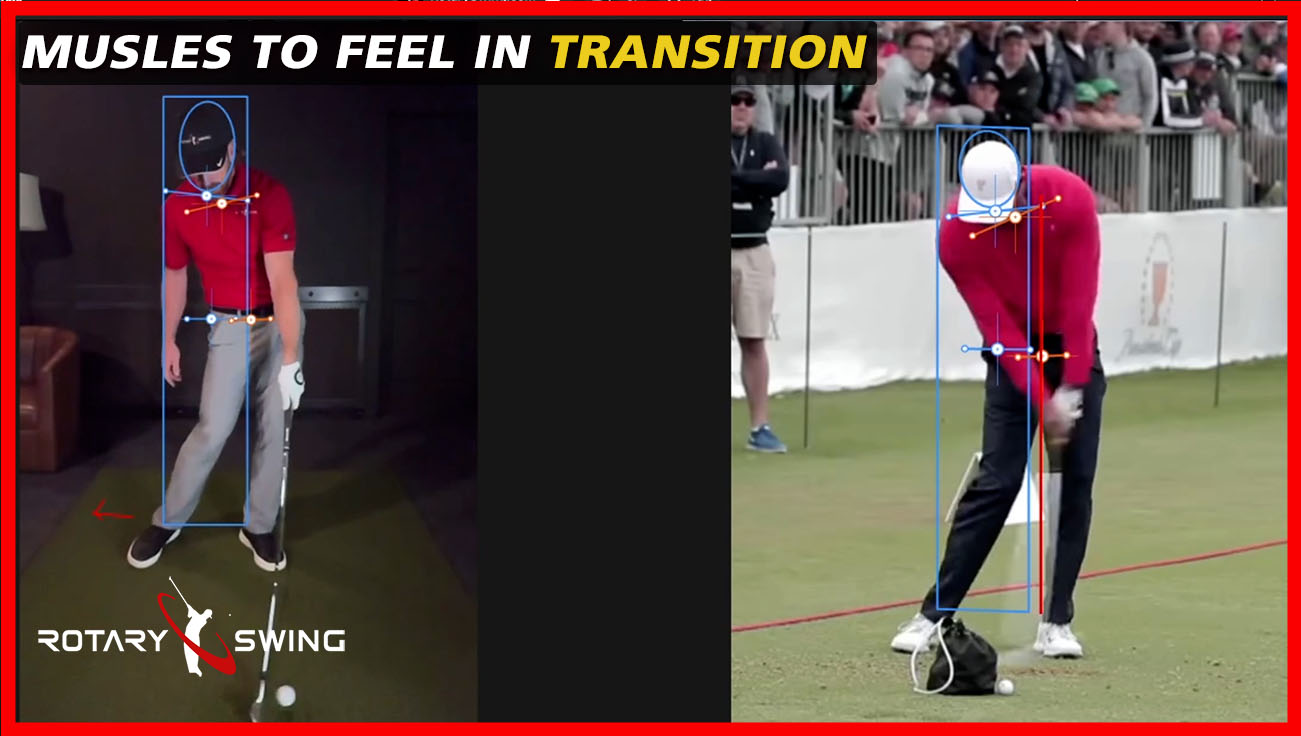
That's why elite players feel like their shoulders stay remarkably shut at the start of the downswing — and the lead arm is actively working to pull the club back down into the impact zone while providing a nice, solid, braced impact position. This is what is meant by the feeling of "dropping the arms" at the start of the downswing. It's not a passive dropping — it's an active pulling of the lead arm.
There have been many great players who essentially went to the top and unwound primarily with the body. Hogan was perhaps the greatest example of this. Hogan struggled with a severe hook for most of his early career, until he built enough compensations into his setup and technique that he could fade the ball. Super weak grip, keeping the club face open at the top, extreme left-side dominance — all of that struggle could potentially have been avoided if he had controlled his shoulder unwind and instead let the lead arm pull the club down. He figured out a way to make it work through sheer repetition and millions of golf balls, but we don't want to go through that same years-long struggle.
We want to keep things simple. As we come down, we are not spinning the shoulders — we are pulling the lead arm down and creating the separation that generates both power and control simultaneously. That is the fundamental concept of proper downswing sequencing.
This exaggerated motion is what you're going to work on in the early stages of learning the drill. Initially, just work on getting that impact alignment correct — the lead wrist flat and the lead elbow pointing down the target line. Nothing else matters in this first stage.
Now work on getting the arms back in front of the body. Not pulling the shoulders — pulling the lead arm. The trail arm is obviously going to contribute as well, but right now the focus is entirely on the lead arm and getting everything into alignment at impact. By alignment, we mean the lead shoulder stacked directly over the lead hip, knee, and ankle — all in a straight vertical line. Complete structural alignment at impact is the goal of the LADD drill.

Late release
That's what it means to be truly in alignment at impact — and from that position, you have a completely solid, stable platform from which to release the golf club into the most powerful, controlled impact of your life.
The second critical consequence of going to the top and unwinding with the shoulders — causing everything to get stuck — is that the club releases late. Because the arms are trapped behind the body, the club is arriving at impact behind schedule. Instead of getting into a proper impact position where all of your stored speed and energy is expended right at the ball, when the release is late, the maximum club head speed doesn't actually occur until well past the ball. That's when all the lag angles finally release fully.
Again, this is completely wasted energy. Your maximum club head speed is happening after the ball has already been sent on its way to the target. It's a total waste of muscular effort. You burned a lot of energy to generate that speed, and then you delivered it after the shot was already made.
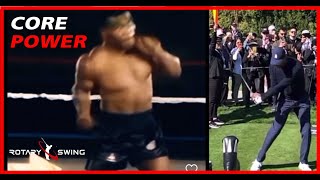
For a lot of golfers, the proper lead arm movement is going to feel like significantly less effort — and that's a critically important thing to understand. If you've been going to the top and just spinning as hard as you can physically manage, this change will feel like you're barely trying. It's a double-edged sword: the faster you spin the body, the more centripetal force you create outward. The faster you turn, the more energy is created at the periphery. And the direct result of that rapid spin is that the club wants to get thrown outward, away from the body — because that's the equal and opposite reaction. Get to the top and spin the shoulders, and the club is cast away from the body. It's the most common and most destructive pattern in amateur golf.

Early release
For the average amateur, the sequence looks like this: they go to the top, they start spinning, the shoulders start working up and out of the shot, the hips race out in front, and now the club is coming in from the outside, already partially released, and now they're just scooping through impact — no compression, no power, no control.
That takes a tremendous amount of physical effort. And what's worse, the harder you try to hit the ball, the more you're going to try and spin because that's what you've associated with speed and power in the golf swing. The harder you try, the worse the result — because the faster you spin, the more you cast. You end up in a position where you actually hit it shorter and higher, and tend to chunk it more, the harder you try. That's one of the most frustrating experiences in all of sport.
The Lead Arm Downswing Drill is going to feel like considerably less effort — and that is a very good thing. That's what we want. It should feel like less effort to generate power in the swing. You should be working less physically hard but delivering more club head speed to the ball — and that's exactly what this drill is systematically building in your swing mechanics.

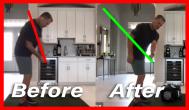
Check your alignment at impact
You're going to perform this drill while hitting balls, and there are a couple of things to check. First, make sure you're in structural alignment at impact — the lead shoulder stacked over the lead leg from hip to knee to ankle.
The opposite of that would be hanging back behind the ball with the upper body falling away from the target. That creates too much secondary axis tilt, the swing path becomes excessively in-to-out, and the pattern of hitting behind the ball and launching it out to the trail side becomes inevitable.
You want to be stacked on top of the ball at impact, so it's going to feel like when you start down, the lead shoulder looks like it's moving down toward the ball rather than rotating up and out and spinning away from it. The visual appearance is that the lead shoulder is working down toward the ball.
If you've never properly compressed a golf ball in your entire life, a large part of that is typically because of this exact mistake — the spinning shoulder pattern. If you start to feel like you're getting on top of the ball — and this is the feeling people describe when they talk about "covering the ball" or having the chest work down over the ball — that's exactly what you're after. You want to feel that you're working down on top of the ball, not spinning your hips and unwinding everything, getting everything stuck, and having the shoulder float up and out of the shot.
The important clarification here is that this is not a conscious attempt to drive the shoulder down. You're not thinking about moving the shoulder. You're shifting your weight while pulling the lead arm down and deliberately not spinning the shoulders as the primary initiator. That's what creates the appearance of the shoulder working down — it's a byproduct of the correct sequence, not a thing you're consciously doing.

Spine angle dictates your path into the ball
The shoulders will end up much more level in this pattern than when an early shoulder spin is used. With proper sequencing, there is no extreme tilt driving a massive in-to-out path. That tilt is what causes a lot of golfers to hit big hooks — they're coming severely from the inside because the spine angle through impact dictates the swing path. The more tilted you are away from the target at impact, the more in-to-out that path becomes. Proper lead-side stacking eliminates this tilt problem.
For players who tend to slice the ball, this is going to feel significantly different from what they're used to. Working on getting the arms into the proper downswing position means learning not to come over the top by spinning the arms down. We are working exclusively on pulling the lead arm down along the proper path.
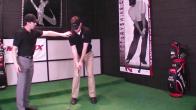
Once that fundamental pattern is established in the body, the next key is to add a training tool to reinforce the feeling and stop at impact so you can physically check your impact alignments. We use an impact bag for that purpose — and it's the single most valuable training aid for this particular drill.

Wrist flat, elbow internally rotated
What we're going to do with the impact bag is choke up on the club, get into impact alignment, and hold the position so you can verify your checkpoints. You want the lead wrist flat, the lead elbow pointing approximately 90 degrees away from the body — internally rotated about 90 degrees — and then you're moving into impact and holding it there for inspection.
Make sure this position doesn't break down into a flip — make sure you're not externally rotating the arm and trying to flip the club through impact. If that flip pattern is deeply ingrained, you have a specific issue to work on. The goal is to arrive in the correct position, hold it, check it, and repeat — not to arrive in the incorrect position, feel it, and try to save it at the last second.
The tremendous added benefit of this correct position is that if you've had any elbow pain from golf — golfer's elbow or similar issues from hitting lots of balls — consider how the elbow is anatomically designed to function. The elbow joint is designed to move in one plane only — bending and extending, not rotating laterally. When the elbow is in an externally rotated position and the force of impact is working across the arm in a lateral direction, you are eventually going to injure that elbow. It's only a matter of time and volume of shots. When the elbow is properly positioned — internally rotated, pointing down the line — the elbow naturally handles the stress of impact in the plane it was designed for.

Force from the wrong direction injures the elbow
The difference between these two positions — externally rotated elbow getting jacked up inside the joint versus properly positioned elbow absorbing impact cleanly — is enormous both for injury prevention and for sustainable long-term development as a golfer. If you were to hit a firm piece of ground or a tree root with the properly aligned elbow, the elbow would simply bend and handle it fine. With the externally rotated elbow, that same impact would be absorbed across the joint in a way that causes acute injury.
This is the added benefit of getting the alignment correct — it removes the source of lead elbow pain in golf while simultaneously improving club face control. Two major problems solved with one correct position. And once you understand the mechanics, you can go even deeper with tools like the GOAT Drill video lesson, which provides AI-guided feedback on exactly how your arm and body positions measure up against elite movement patterns.
Understand that both arms have a specific job to do in the downswing. The lead arm is working down along the proper path, the trail arm is working down in support, and as we arrive at impact we are actively checking our lead arm impact alignments. That's the entire purpose of the Lead Arm Downswing Drill.
Now, as you get more comfortable with it, you can start working on hitting balls using the lead arm only drill. It's similar to the Trail Arm Only Downswing Drill in that it's quite challenging to do with just one arm, but this is a tremendously effective way to isolate and train the lead arm pattern. Don't try to hit the ball far when doing this. That's completely beside the point.
The entire point is to get into the proper alignments — so that instead of flipping the club face through impact, you are squaring it up in a controlled, repeatable manner. As we've discussed, both arms have a job to do, and the goal is ultimately to compile both of them into a unified, coordinated motion.

Proper impact alignment
In that unified, two-arm motion, you are now in a stable, powerful, repeatable impact position. That's how the lead arm works in the golf swing — from the top of the backswing, down into the impact zone, checking that the elbow is at approximately 90 degrees of internal rotation, the lead wrist is flat and firm, and everything is working into that solid, aligned impact position where the lead shoulder, hip, knee, and ankle are stacked vertically over the lead foot.
If you've always been an inconsistent ball-striker and you start working seriously on this lead arm isolation drill, it is going to make a profound difference in your golf swing. The players who commit to this process are always shocked at how quickly the pattern translates to the course.
If you're a player who has relied heavily on the trail side for years, this is going to feel awkward at first — and that's completely normal. Take your time with it. It is going to take repetitions in order to get comfortable with this new pattern. But as you start doing it consistently, you're going to find yourself saying: "I used to really flip the face through impact, and now I can actually control the club face and know where the ball is going before I even hit it."
That is the transformation this drill creates. That is the feeling of true control over the golf ball — and it will make a massive, permanent difference in your ball striking consistency.
{/josociallocker}
Watch part 2 now to see how you're moving your body in the opposite direction of the pros!